GR-ADZUKI PROGRAM STRUCTURE
Arduinoのプログラム構造を説明します。基本的に2つの関数が用意されています。

void setup()関数とvoid loop()関数です。setup関数は、プログラムを初期化するためのコードを書く場所です。最初に1回だけ実行されます。ここでハードウェアの設定などを行います。loop関数は、プログラムの実際の処理コードを書く場所です。この関数は、関数名の通り繰り返し実行されます。
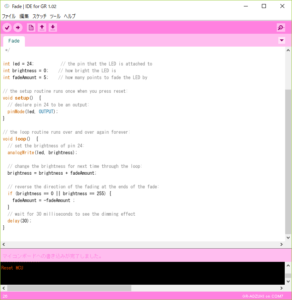
サンプルプログラムの中を見ていきます。
int led = 24; // the pin that the LED is attached to
int brightness = 0; // how bright the LED is
int fadeAmount = 5; // how many points to fade the LED by
まず、変数の宣言を行っています。
// the setup routine runs once when you press reset:
void setup() {
// declare pin 24 to be an output:
pinMode(led, OUTPUT);
}
pinMode関数は、ピンの入出力設定を行う関数です。
ここでは、24ピンを出力用に設定しています。
// the loop routine runs over and over again forever:
void loop() {
// set the brightness of pin 24:
analogWrite(led, brightness);
// change the brightness for next time through the loop:
brightness = brightness + fadeAmount;
// reverse the direction of the fading at the ends of the fade:
if (brightness == 0 || brightness == 255) {
fadeAmount = -fadeAmount ;
}
// wait for 30 milliseconds to see the dimming effect
delay(30);
}
まず、analogWrite関数でアナログ出力を行っています。
LEDの明るさを設定しています。
brightness = brightness + fadeAmount;
明るさの強さを変更しています。
if (brightness == 0 || brightness == 255) {
fadeAmount = -fadeAmount ;
}
if分は、条件を判定する命令です。
“==”は、値が同じ条件です。”||”は、論理式で”または”(OR)の意味です。
2つの条件が片方どちらかが一致すれば次のかっこの中を実行します。
かっこの中は、明るさを増やす方向と減らす方向を切り替えます。
fadeAmount = -fadeAmount ;
delay(30);
最後のdelay関数は、一定時間待つ関数です。
ここでは、30ミリ秒待ちます。
次のloop関数が実行されるのを遅らせます。
I will explain Arduino’s program structure. Basically two functions are provided.
The two functions are the void setup() function and the void loop() function. The setup function is the place to write the code to initialize the program. It is executed only once at the beginning. Here we will configure the hardware etc. The loop function is the place to write the actual processing code of the program. This function is repeatedly executed as the function name does.
I will look through the sample program.
int led = 24; // the pin that the is is attached to
int brightness = 0; // how bright the LED is
int fadeAmount = 5; // how many points to fade the LED by
First, we declare variables.
// the setup routine runs once when you press reset:
void setup () {
// declare pin 24 to be an output:
pinMode (led, OUTPUT);
}
The pinMode function is a function that sets pin input / output.
In this example, 24 pins are set for output.
// the loop routine runs over and over again forever:
void loop () {
// set the brightness of pin 24:
analogWrite (led, brightness);
// change the brightness for next time through the loop:
brightness = brightness + fadeAmount;
// reverse the direction of the fading at the ends of the fade:
if (brightness == 0 || brightness == 255) {
fadeAmount = -fadeAmount;
}
// wait for 30 milliseconds to see the dimming effect
delay (30);
}
First, analog output is done with the analogWrite function.
The brightness of the LED is set.
brightness = brightness + fadeAmount;
I am changing the intensity of brightness.
if (brightness == 0 || brightness == 255) {
fadeAmount = -fadeAmount ;
}
if is an instruction to determine a condition.
“==” is a condition with the same value. “||” means “or” (OR) in a logical expression.
If one of the two conditions matches, the next bracket is executed.
In parentheses, we change the direction to increase and decrease the brightness.
The last delay function is a function to wait for a certain time.
Here wait 30 milliseconds.
Delays execution of the next loop function.
我將解釋Arduino的程序結構。 基本上提供了兩個功能。
這兩個函數是void setup)函數和void loop)函數。 設置功能是寫入代碼來初始化程序的地方。它在開始時只執行一次。 這裡我們將配置硬件等 循環功能是編寫程序實際處理代碼的地方。 這個函數是重複執行的,因為函數的名字是。
我會看看示例程序。
首先,我們聲明變量。
/ / the setup routine runs once when you press reset:
void setup () {
// declare pin 24 to be an output:
pinMode (led, OUTPUT);
}
pinMode功能是設置引腳輸入/輸出的功能。
在這個例子中,24個引腳被設置為輸出。
/ / the loop routine runs over and over again forever:
void loop () {
// set the brightness of pin 24:
analogWrite (led, brightness);
// change the brightness for next time through the loop:
brightness = brightness + fadeAmount;
// reverse the direction of the fading at the ends of the fade:
if (brightness == 0 || brightness == 255) {
fadeAmount = -fadeAmount;
}
// wait for 30 milliseconds to see the dimming effect
delay (30);
}
首先,使用analogWrite函數完成模擬輸出。
LED的亮度被設定。
fadeAmount = -fadeAmount ;
我正在改變亮度的強度。
if (brightness == 0 || brightness == 255) {
fadeAmount = -fadeAmount ;
}
如果是確定條件的指令。
“==”是具有相同值的條件。 “||”表示邏輯表達式中的“或”(OR)。
如果兩個條件中的一個匹配,則執行下一個括號。
在括號中,我們改變方向來增加和減少亮度。
最後的延遲功能是等待一定時間的功能。
在這裡等待30毫秒。
延遲下一個循環函數的執行。
