
GR-ADZUKI SERVO MOTOR
GR-ADZUKIにはサーボモーター用ピンヘッダがあります。
小型のサーボモータが使用できます。
マイクロサーボ9g SG-90を使用します。
http://akizukidenshi.com/catalog/g/gM-08761/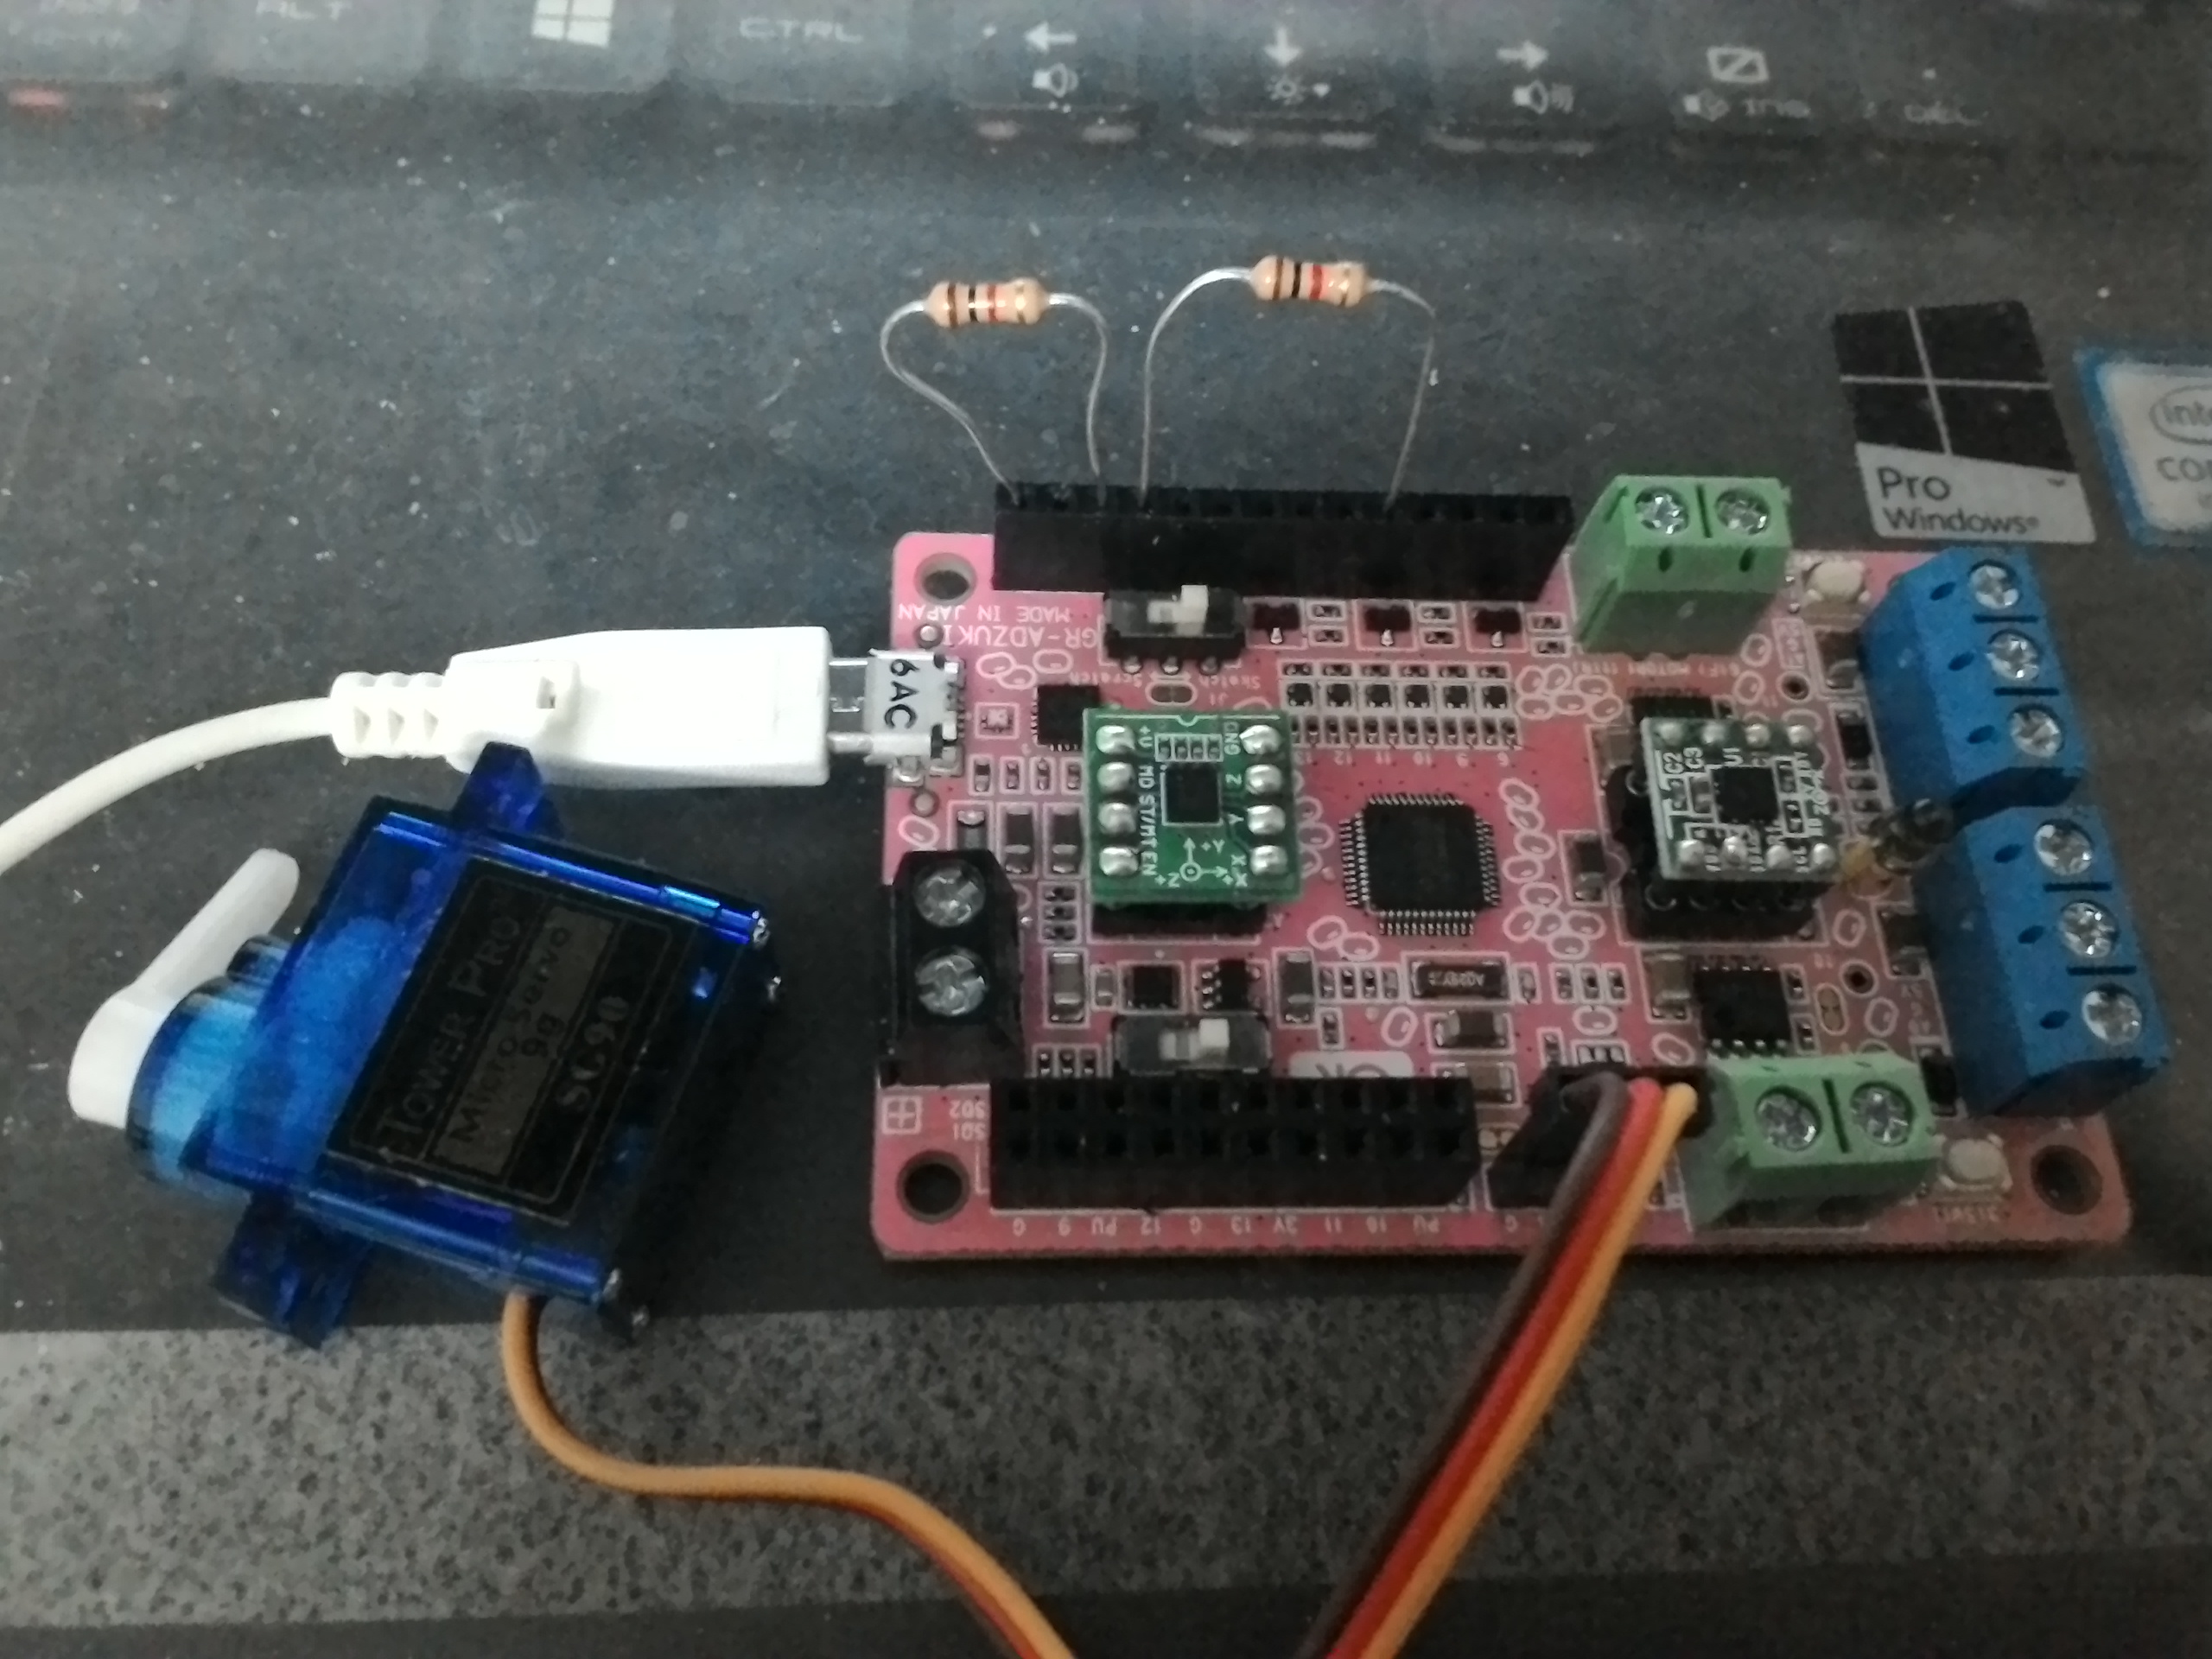

3ピンコネクトはどちらの向きにもさせるので、ケーブルをさす向きに注意してください。
サーボモータ制御ピンは、4ピンが割り当てられています。
プログラムは、SERVOのSWEEPが利用できます。
https://www.arduino.cc/en/Tutorial/Sweep
左ボタンを押すとサーボホーンを180度往復させるプログラムを作成しました。
プログラムの説明をします。
#include <Servo.h>
サーボを使用するのでヘッダファイルをインクルードします。
サーボとボタンのピンを宣言します。
Servo myservo; // create servo object to control a servo
const int L_button = 3; // the number of the pushbutton pin
サーボ位置とボタン状態を宣言します。
int pos = 0; // variable to store the servo position
int L_buttonState = 0; // variable for reading the pushbutton status
setup()関数では、サーボモータの制御ピンに4ピンを割り当てます。
myservo.attach(4); // attaches the servo on pin 4 to the servo object
サーボの初期値を書き込みます。
myservo.write(pos); // tell servo to go to position in variable ‘pos’
左ボタンを入力に設定します。
pinMode(L_buttonState, INPUT_PULLUP);
loop()関数では、まず左ボタンの状態を読み込みます。
L_buttonState = digitalRead(L_button);
ボタンが押されているとき1度ずつ10ms毎に動かします。
if (L_buttonState == LOW)
{
for(pos = 0; pos <= 180; pos += 1) // goes from 0 degrees to 180 degrees
{ // in steps of 1 degree
myservo.write(pos); // tell servo to go to position in variable ‘pos’
delay(10); // waits 105ms for the servo to reach the position
}
180度まで行くと反転し、0度まで10ms毎に動かします。
for(pos = 180; pos>=0; pos-=1) // goes from 180 degrees to 0 degrees
{
myservo.write(pos); // tell servo to go to position in variable ‘pos’
delay(10); // waits 10ms for the servo to reach the position
}
}
サンプルプログラムは以下にあります。
https://github.com/jendo1969/GR-ADZUKI2/blob/master/Servo/Servo.ino
GR-ADZUKI has pin headers for servo motors.
A compact servo motor can be used.
Micro servo 9 g SG-90 is used.
http://akizukidenshi.com/catalog/g/gM-08761/
Pay attention to the direction that the cable is pointing, because 3-pin connect is made in either direction.
The servomotor control pin has 4 pins assigned.
SWEEP of SERVO is available for the program.
https://www.arduino.cc/en/Tutorial/Sweep
Pressing the left button created a program that reciprocates the servo horn 180 degrees.
I will explain the program.
#include <Servo.h>
Because we use servo, include header file.
Declare servo and button pins.
Servo myservo; // create servo object to control a servo
const int L_button = 3; // the number of the pushbutton pin
Declare servo position and button state.
int pos = 0; // variable to store the servo position
int L_buttonState = 0; // variable for reading the pushbutton status
The setup() function assigns pin 4 to the control pin of the servomotor.
myservo.attach(4); // attaches the servo on pin 4 to the servo object
Write initial value of servo.
myservo.write(pos); // tell servo to go to position in variable ‘pos’
Set the left button to input.
pinMode(L_buttonState, INPUT_PULLUP);
In the loop() function, first read the state of the left button.
L_buttonState = digitalRead(L_button);
When the button is pressed, move it by 1 degree every 10 ms.
if (L_buttonState == LOW)
{
for(pos = 0; pos <= 180; pos += 1) // goes from 0 degrees to 180 degrees
{ // in steps of 1 degree
myservo.write(pos); // tell servo to go to position in variable ‘pos’
delay(10); // waits 105ms for the servo to reach the position
}
When it goes to 180 degrees it flips and it moves every 10 ms to 0 °.
for(pos = 180; pos>=0; pos-=1) // goes from 180 degrees to 0 degrees
{
myservo.write(pos); // tell servo to go to position in variable ‘pos’
delay(10); // waits 10ms for the servo to reach the position
}
}
The sample program is below.
https://github.com/jendo1969/GR-ADZUKI2/blob/master/Servo/Servo.ino
GR-ADZUKI具有用於伺服電機的引腳。
一個緊湊的伺服電機可以使用。
使用微型伺服9克SG-90。
http://akizukidenshi.com/catalog/g/gM-08761/
注意電纜指向的方向,因為3針連接是在任一方向上進行的。
伺服電機控制引腳有4個引腳分配。
SERVO SWEEP可用於該程序。
https://www.arduino.cc/en/Tutorial/Sweep
按下左按鈕創建一個程序,使伺服喇叭往復180度。
我會解釋一下這個程序。
#include <Servo.h>
因為我們使用伺服,所以包含頭文件。
聲明伺服和按鈕引腳。
Servo myservo; // create servo object to control a servo
const int L_button = 3; // the number of the pushbutton pin
聲明伺服位置和按鈕狀態。
int pos = 0; // variable to store the servo position
int L_buttonState = 0; // variable for reading the pushbutton status
setup()函數將引腳4分配給伺服電機的控制引腳。
myservo.attach(4); // attaches the servo on pin 4 to the servo object
寫伺服的初始值。
myservo.write(pos); // tell servo to go to position in variable ‘pos’
設置左鍵進行輸入。
pinMode(L_buttonState, INPUT_PULLUP);
在loop()函數中,首先讀取左邊按鈕的狀態。
L_buttonState = digitalRead(L_button);
當按下按鈕時,每10毫秒移動1度。
if (L_buttonState == LOW)
{
for(pos = 0; pos <= 180; pos += 1) // goes from 0 degrees to 180 degrees
{ // in steps of 1 degree
myservo.write(pos); // tell servo to go to position in variable ‘pos’
delay(10); // waits 105ms for the servo to reach the position
}
當它達到180度時,它會翻轉,每10毫秒移動一次,直到0度。
for(pos = 180; pos>=0; pos-=1) // goes from 180 degrees to 0 degrees
{
myservo.write(pos); // tell servo to go to position in variable ‘pos’
delay(10); // waits 10ms for the servo to reach the position
}
}
示例程序如下。
https://github.com/jendo1969/GR-ADZUKI2/blob/master/Servo/Servo.ino